Homemade Water Injection Page Updated with more useful info and pictures! |
|||
| Getting to Know
Water Injection
The benefits of Water Injection are substantial and well documented. A lot of people hear about the idea of injecting water into the air that enters the engine and wonder if putting water into the engine isn't a bad thing. The truth of the matter is that it's a very good thing if done properly. Only a small amount of water is injected as a fine mist. This mist is evaporated quickly in the hot intake air. As the water evaporates, it cools the intake charge significantly. Cooler intake temperatures make the engine less likely to knock. This allows the ECU to fully advance timing and extract more power. This strong cooling effect also makes the air more dense so the air mass in the cylinder can increase, which allows the fuel delivery amount to increase, which increases the power released for each turn of the engine. It's often said that water injection will allow your car on a hot day to run as well as it does on a very cold day. For turbocharged cars, this also means that the engine can be run at a higher level of boost for a given grade of gas and ambient temperature. Often, non-turbocharged or supercharged vehicles will not see much of a benefit. However, it can allow high compression normally-aspirated cars to possibly run on a lower grade of gas. Once you're convinced of the need for a water injection kit, you have to buy one. The choices go from the low-end Spearco system (which can be bought for about $160) to the high-end Aquamist systems, which start at $400 and go up into the thousands. Many people complain about the quality of the pump and the nozzles included in the Spearco system, but many people also complain about the price of the high-quality Aquamist systems. So one alternative is building a system yourself. This page will detail my efforts to build and tune my water injection system. Good additional resources are:
A Merkur page with
lots of good info
|
Notes on Nozzle Choice:
I spoke with Brad Schaeffer at Georges Imports (816-333-6582). He's a very
knowledgeable guy when it comes to water injection. Anyway, he clued me into Aquamist's web page.
www.aquamist.co.uk. If you click on "supplier listing" then click on one of the green checkmarks next to a jet-nozzle on the left, a chart comes up with the flow rates for each nozzle based on supply pressure. It's listed for 5 bar and 7 bar. 5 bar is 73 psi, and 7 bar is about 102 psi. Since
the pump that I'll be using oscillates from about 80 psi to 100 psi, our pump will be in the middle of those two figures.
|
||
|
Parts List: Most all of the parts need to be able to work with the conditions found under the hood of an automobile.
|
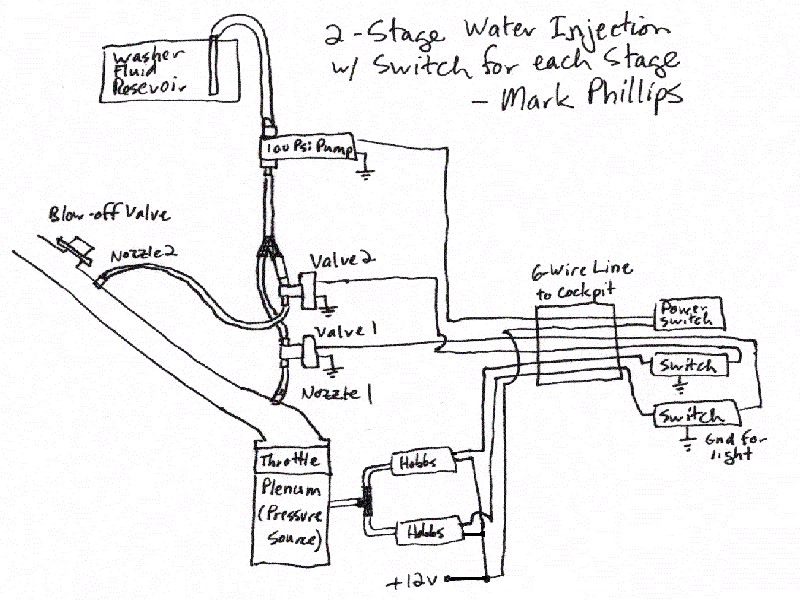
New Diagram: Download the picture to see
a hand drawn diagram of the water and electrical lines.
|
||
 |
One of the hardest things about
this project is getting all the pieces parts together. Phew!
Lot's of trips to the store for 1-5$ items.
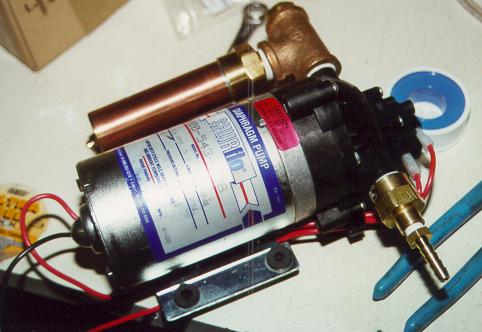
One of the first areas I concentrated on was the pump. As seen on the left, I got a water hammer (the copper cylinder) to minimize pressure fluctuations and keep the switch in the pump from switching as often. This fit right on the pump I got (once I bought a "T" anyways). I then has to install a reducer fitting to reduce down for the Aquamist quick-release line connector. On the feed line of the pump, I put on another reducer and a hose barb for connecting the supply hose.
|
||
|
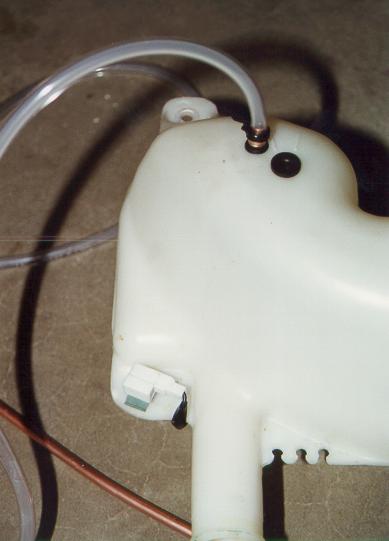
On the 1995 Mitsubishi Eclipse GSX, the windshield wiper reservoir is in the trunk under the spare tire. I removed the tank and was happy to see that it already has a level sensor. I drilled a hole in the top, put in a rubber grommet. I took a length of copper tubing and inserted that through the grommet. I then took some tubing, put that over the copper and further fastened it down with a zip-tie. |
 |
||
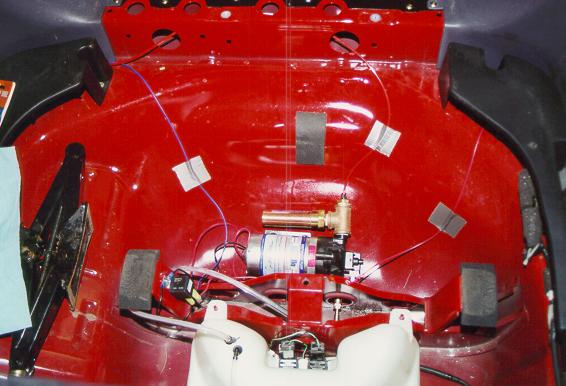 |
I was just able to finagle the pump into a position that would work with the tire in the car. I has to stick the hose barb through a hold in the spare support. I put the tank back in. I drilled holes through the bottom of the car and bolted the pump in. You can also see the relay (left) for turning on the power to the pump. The relay gets power from my fuel pump rewire. The control signal will come from a switch in the cockpit. These wires and the water line run out and under the rear seats. | ||
| After going under the rear seats, I popped out the trim and ran the hose and wire in there. Plenty of room and it's protected too. | 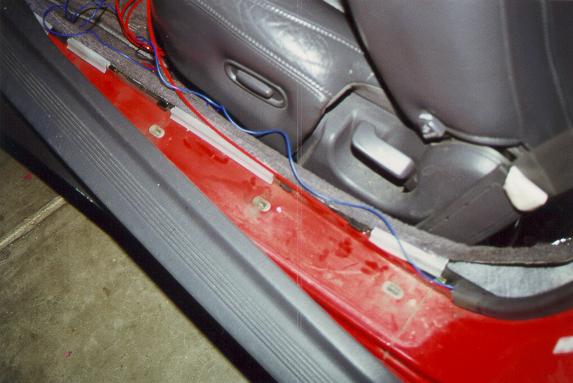 |
||
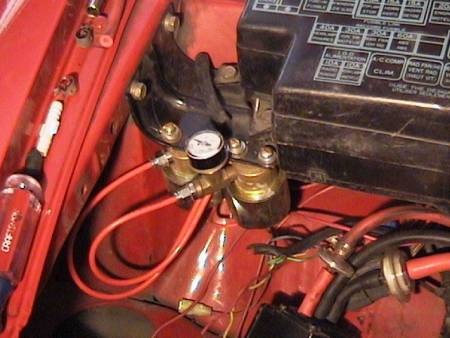 |
In the engine compartment, I installed the solenoids over by the fuse box. One the source side of one of them, I installed a little gauge that tells the pressure the pump is putting out. From here, the lines run to the nozzles. | ||
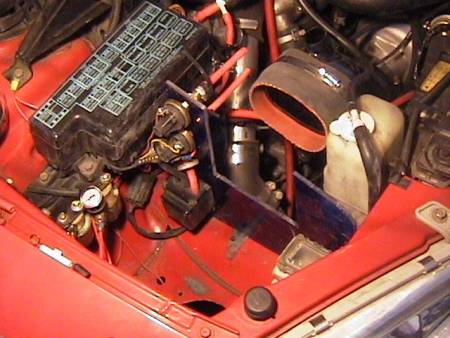
| I installed the
Hobbs Switch on my cold air intake dam.
They are in a place where I can easily adjust the switch pressure.
The multi-wire line gets power from the fuse box and ground nearby, and
runs to the cockpit for the switches.
The power goes first to the Hobbs switches, then the line continues to the cockpit switches. These switches are wired so that they will illuminate when the Hobbs switch turns on. This way, you know at what boost pressure each stage comes on. Then if the switches are engaged, the power goes back to the solenoids (the opposite direction trough the same multi-wire line) in order to open them and permit flow. |
 |
||
|
I'll try to do some data logging soon to tune and document the advantages of the water injection.
|
|||
| Return to the Eclipse Page. | Cold Air Intake Page | ||
