Timing Belt Tips for a 2G |
|||
| I
wanted to share some tips that might help with the changing of the timing
belt on a 95-99 Eclipse GSX or Talon Tsi. These are designed to
supplement www.vfaq.com.
Tools: It was helpful to have 3 different sized ratchets (small, med, large) and deep well sockets. Almost everything is a 10,12,14, or 17 mm, and a couple extension lengths are handy. Special tool made from bar of metal for holding crankshaft (see www.vfaq.com). Have a torque wrench. |
|||
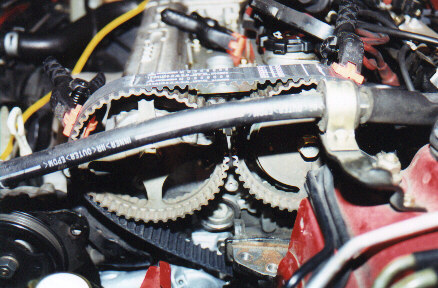 |
Follow the instructions at www.vfaq.com. If you're replacing you auto-tensioner, as you should, you don't need the auto-tensioner tool. Jacking up the engine using some wood and a cloth in between the jack and the oilpan is fine. You don't raise it much above it's normal height. Take out the spark plugs so the engine turns easier. After you get the motor mount off, remove the stud on the left. To do this, put both nuts on the same stud. Tighten them together, then use a 17mm wrench to turn the stud out. This allows you to get the middle timing belt cover off w/o breaking it. You don't need to remove the motor mount bracket from the block. The power steering and the alternator do NOT have to come off. They have to be loosened to remove belts, and one bolt/bracket has to be removed which covers the water pump. Use chalk to mark spots on the belt and all the toothed pulleys before de-tensioning and removing the belt. These don't have to be the timing marks, but put marks on the belt, also label the top of the belt between the 2 camshaft pulleys. You might be able to see the marks in the picture on the left. After taking off the belt, transfer the marks to the new belt (easy to do since the belt has large teeth). This way, when you put the belt back on, you have a second set of marks to give you confidence that you have lined everything up right. This helped A LOT. When you take the water pump off, you don't have to drain the radiator. A lot of fluid will come out, though, so have a bucket ready. Make sure and check CAREFULLY to make sure you get all of the old gasket off. It can hide. It's messy. To take off the old tensioner, loosen the associate pulley, then just take out the bolts that hold the tensioner on. No big deal. When it comes time to put it on, pre load the belt by pushing the pulley against the belt (use a tool handle for leverage) and tighten down the pulley. Put in the new tensioner, and if the pulley arm is close to the tensioner, pull the grenade pin. If not, move the elliptical pulley farther to tighten the belt more and bring the pulley arm closer to the auto-tensioner. The two holes on the pulley should be pointed down. Once the tensioner is released, check to make sure it isn't extended too far. When I did it, using a ruler I was able to see that it barely moved out from where the pin was in, so I knew that I had it in the right spot (the spec for the gap is 4mm or so, see vfaq). If it's too far out, loosen the pulley, remove the auto-tensioner, carefully recompress it very slowly in a vise, put the pin back in, and try again. When going for the B-belt, you may have to loosen or remove a small sensor that rides over a fin on a plate behind the crankshaft. Getting the water pump out is a fun little puzzle, or like John E. says, "it's like a monkey with his hand in a gourd." Well anyway, try to get the drive pulley part of the pump worked over into the area where the motor mount was. That's one way to get it out/in. When putting the car back together, always try to implement the torque specs. On the bolts where you can't get a torque wrench to, get a good feel for what 10, 20, 40 foot-pounds are on other bolts (using the torque wrench to practice). Don't overtighten any belts, incl. the accessory belts. My pulleys felt fine at 60,000. Looking at the front crank shaft seal, there was a little oil seeping out around it. So, we replaced it. I had no experience in the this area, but we did it. Here are some suggestions. When taking the old seal out, you don't want to score the surface it seals to. One approve (which we used) was to drill a small hold into the seal, being careful not to overshoot. Once the hole was there, using a small pointy object the seal could be popped right out (actually, I think ours might have come off with the drill bit). Pre-oil the new seal. Put it in carefully, putting even pressure on the seal. I started it by hand, and finished it with a piece of PVC pipe that was the right diameter. I could put the pipe right over the seal and tap the pipe with a rubber mallet. Job done. |
||
| The whole procedure is outlined well at www.vfaq.com and hopefully these hints will be helpful. I also installed an Unorthodox underdrive pulley. It rubbed against the timing belt cover for awhile until the ridge there was worn down. Not everyone has this problem. | 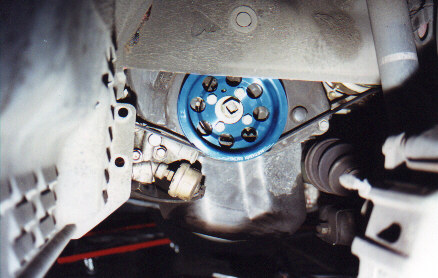 |
||
| Return to the Eclipse Page. | A special thanks to John Auxier for his invaluable help and use of his garage. | ||
