Alamo FMIC on a 2G |
|||
| The
installation of this Alamo Front Mount Intercooler was relatively straight forward.
I'll try to include some useful information and pictures here. My car is a 95
GSX. Previously, I had the stock side mount IC, which is small and restrictive. First, jack up the car. |
 |
||
 |
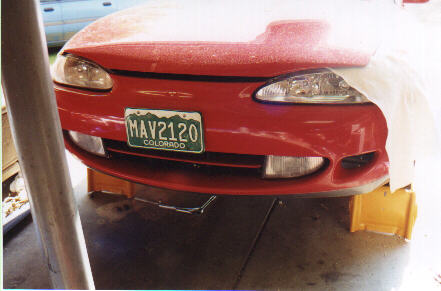
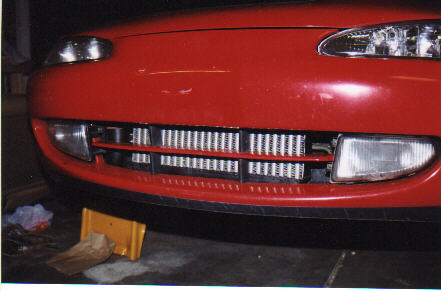
Remove the bumper. This requires remove the plastic rivots in the wheel wells, 2 bolts just forward of the wheel wells in the fender on each side, and 2 bolts from each side of the bumper under the car. There may be a couple others. | ||
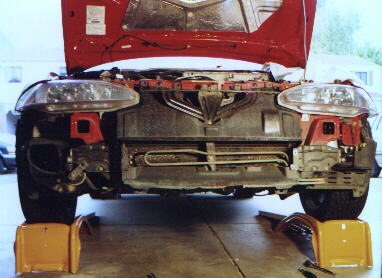
| Remove plastic junk, including the ducting to the side mount IC and the plastic in front of the radiator. Also remove the metal brace by the hood latch. In this picture you can get an idea on the difference in size between the FMIC and the side mount. There are much larger FMICs available, but this one lets you keep your fog lights. Notice the power steering line. This had to be relocated behind the brace down the center of the radiator. Do this however you can. :) | 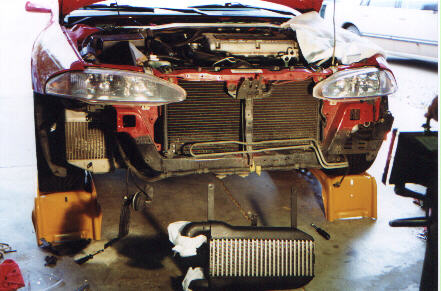 |
||
 |
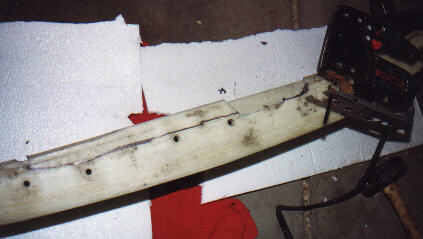
This is a picture of the inside of the bumper. There's the outer plastic and the inner bumper. The inner, actual bumper is tough and is probably fiberglass. Notice also the small metal bracket for holding the liscence bracket. This bracket won't fit anymore. Either remove it altogether, or take out the center bolt and reverse it. That may work. | ||
| Use some zip ties to put the IC close to where it will go. You'll have to drill one hole on the bottom for the bottom brace. No big deal. You want the IC close to the brace, but not against it. That would bend fins and restrict air flow. Too far out, and a LOT of cutting would have to be done. The brace in front of the radiator could probably be removed, but I chose to leave it. The top brackets on the IC use some spare holes on the car. You'll need appropriate bolts and nuts. | 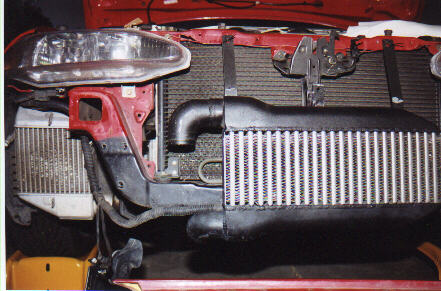 |
||
 |
Cutting the bumper is THE pain. You have to cut the plastic and the fiberglass. The plastic is easy to cut. So easy that I recommend a guide. You can use dremel bit #561 (multipurpose cutting bit). | ||
| Cutting the fiberglass eats blades. Have several. A coping saw (10$) works but was slow. You may need to go through a few iterations of sliding the bumper on and seeing what else needs to be trimmed. | 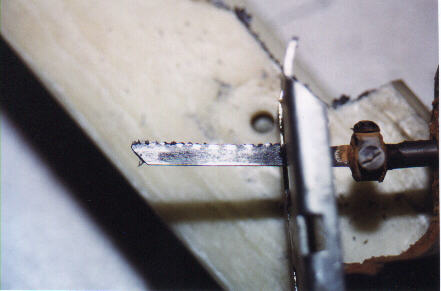 |
||
 |
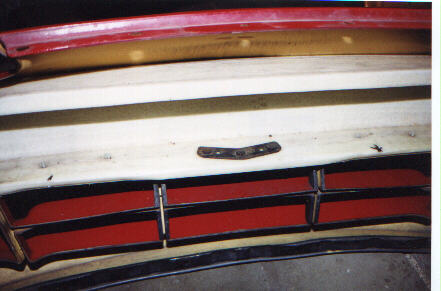
Update! I took the front bumper off for my oil filter relocation kit, and John Auxier helped me cut a better breather hole in my bumper with a circular saw; much easier. We only cut out the regions that didn't include a fixing point for the painted part of the bumper. | ||
| We then bent the license plate bracket around and screwed it into place. It works great! (Bumper pictured upside down) | 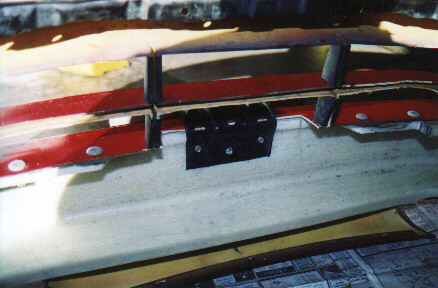 |
||
 |
Attach the new pipes. For my
kit, the lower IC pipe goes under the radiator. This makes it a tad low on the front
end, but if you fit it carefully and tightly, it's acceptable. There is barely
room for the fog light bracket, but it works. Bolt on the bumper and enjoy the
performance gain!
Return to the Eclipse Page. |
||
